Recipe Spotlight: Half-Moon Cookies
September 2016
A Sweet to Savor
If you’re new to Rochester, you’re sure to have brought with you plenty of sentimental food preferences. (Pierogies, anyone?) Well, Upstate New York is pretty renowned for its distinctive (you might call them “quirky”) regional foods. While weck, riggies, and foods made “French” are all savory, there’s no shortage of sweets that say “I love New York.” Today we’d like to share a favorite that’s especially popular with kids – the half-moon cookie.
Black & White & Yum All Over
Think of a gob (aka Whoopie Pie) split in two as though the baker decided a whole sandwich-cookie made of cake would be too much. Imagine also that this baker couldn’t decide whether to stick the halves together with vanilla or chocolate icing. That, my friend, is essentially what a half-moon cookie is all about. (Ooh – and if you stick 2 half-moon cookies together – ultra, mega gob!) Upstate New Yorkers, however, are not particularly likely to understand if you speak in terms of gobs.
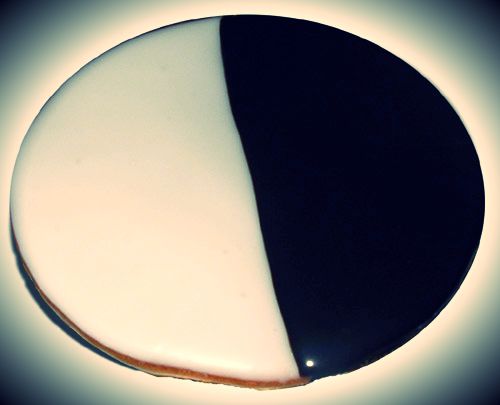
One of these things is not like the others.
They’ve been called Black & Whites, Half & Halfs, and even Unity Cookies, but Upstate New York’s half-moon cookies stand apart. The common theme between all these split cookies is equal coverage with vanilla and chocolate icing — half and half. But where the downstate version involves something like shortbread, bakers of the half moon replace the base with something even more downright delicious — devil’s food cake.
Make them at home!
Why drive all the way out to the Pittsford Dairy or Powers Farm Market when you can have soft, homemade half-moon cookies any day of the year? With this recipe, you can decide just how to make them!
Ingredients
Cookies
- 3 3/4 cups flour
- 3/4 teaspoons baking powder
- 2 teaspoons baking soda
- 2 1/4 cups sugar
- 16 tablespoons butter, softened
- 3/4 cup cocoa, sifted
- 1/4 teaspoon salt
- 2 eggs
- 1 teaspoon vanilla extract
- 1 1/2 cups milk
Frosting
- 6 tablespoons butter, softened
- 2 2/3 cups confectioners’ sugar
- 1/3 cup milk
- 2 tablespoons milk
- 1 teaspoon vanilla
- 1/3 cup cocoa powder
Instructions
Cookies
- Adjust oven racks to lower-middle and upper-middle positions. Preheat oven to 350 degrees. Line two baking sheets with parchment paper.
- In a large bowl, whisk together flour, baking powder, and baking soda; set aside.
- Beat the butter at medium speed for 30 seconds. Keeping the mixer running, gradually add in the sugar and cocoa powder, then gradually increase the speed to medium-high and beat until the mixture is light and fluffy — about 3 minutes. Scrape down the sides of the bowl and add the eggs and vanilla. Beat at medium speed until combined — about 30 seconds. Scrape down the sides and bottom of the bowl again. With mixer on low speed, alternately add the flour in four additions and the milk in three additions (beginning and ending with flour), and mix until just combined. Give the mixture a few final stirs with a rubber spatula to ensure all of the flour has been incorporated.
- Portion out mounds of dough onto the prepared baking sheets about 2 inches apart. Using a spatula, gently press each mound of dough into a 3-inch circle. Bake until the edges of the cookies are set and light golden brown — about 12 minutes. Allow the cookies to cool for 2 minutes on the baking sheets, then remove to a wire rack to cool completely.
Frosting
- Cream the butter in a small bowl. Blend in the confectioners’ sugar and vanilla alternately with the 1/3 cup milk. Beat until the consistency is creamy, with no lumps.
- Remove just over half the frosting into a separate bowl, leaving the remainder to be turned into chocolate frosting.
- To the mixing bowl, add 1/3 cup cocoa powder, plus 1-2 Tbsp of additional milk.
- Beat until the cocoa is all mixed in and the frosting is nice and smooth.
- Frost the tops of the cookies — half chocolate and half white.
From Home in the Finger Lakes.